Step-by-Step Guide to Install Fail2Ban for Server Security


Fail2Ban is a must-have tool for safeguarding servers from brute-force attacks by blocking suspicious IPs automatically. In this detailed guide, we’ll walk you through every step to install, configure, and optimize Fail2Ban for automatic restarts in case of failure. Learn how to effectively enhance your VPS security with seamless IP blocking, ensuring continuous protection for your server. With clear instructions and practical tips, this guide ensures your website remains secure the right way. Stay ahead of potential threats and protect your online presence with Fail2Ban.

1. Install Fail2Ban
To get started, update your package manager and install Fail2Ban:
2. Set Up Default Configuration
Make a copy of the default configuration file to avoid losing changes during updates:
Edit the copied file to enable SSH protection:
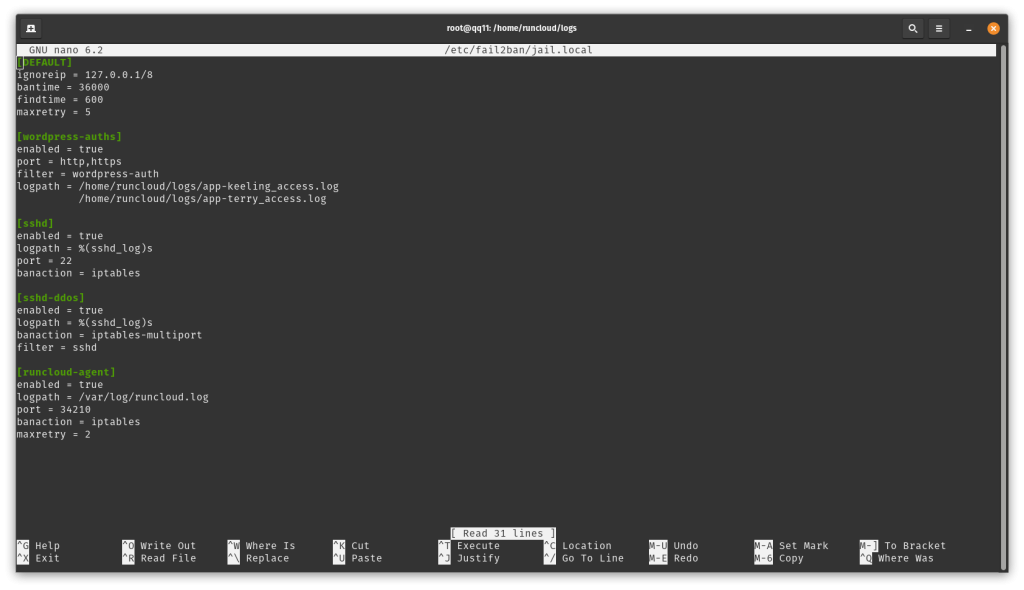
Update the [sshd] section as follows:
3. Enable Fail2Ban on Boot
Ensure Fail2Ban starts with your server:
Start and check its status:
4. Configure Automatic Restart
Prevent Fail2Ban from staying down in case of failure. Create an override file:
Add the following lines to enable auto-restart:
Reload systemd and restart Fail2Ban:
5. Verify Configuration Fail2ban
To check active jails and their statuses:
For detailed information about the SSH jail:
With these steps, your server will be protected against brute force attacks and Fail2Ban will be set to automatically restart if it fails.
Related Questions
How can I fix the configuration error in /etc/fail2ban/jail.local
What should I do if the Fail2ban service does not start correctly
How can I check the Fail2ban logs for errors
What does error code 255/EXCEPTION mean in Fail2ban
How can I restart the Fail2ban service without errors